This page presents instructions how to obtain and automatically renew certificates issued by Let's Encrypt. The page also contains an introduction to encryption and provides instructions for configuring the Apache web server.
The instructions are written for users of the Linux operating system and was verified on several versions of Fedora starting with 23 and Raspbian GNU/Linux 8 (jessie) distributions. The author hopes that the information will also be useful for users of other distributions and operating systems.
The original version of the text addressed explanation of obtaining and renewal of a single SAN certificate. This version modifies the procedure so that several certificates can be obtained and renewed if the corresponding domains are hosted on the same computer.
This chapter is very simplified and is intended for readers without any knowledge of cryptography. If you have an experience with cryptography, continue directly to chapter Tools. You can read about cryptography in a greater detail on a page entitled Public key cryptography: What is it, how it work and how to use it in email and file encryption.
A computer does not understand letters, it only knows digits zero and one that are grouped to larger entities that can be expressed as decimal numbers. It is then possible to assign numeric values to letters so that a computer could indirectly work with them. In the ASCII encoding we thus have assignments A=65, B=66, C=67, D=68, E=69, etc. Now suppose we have a sequence of letters and we want to encrypt it. The letters are stored as numbers in a computer therefore we can apply a mathematical formula to them. For simplicity we will apply addition of a constant value. Let the constant value be +1. The string POT will then be converted to numbers, the computer will apply the formula and the resulting numbers are again expressed as letters. Addition of +1 means the next character in the alphabet hence the encrypted string will be QPU. Deciphering will be carried out by the very same operation but we will add –1. Since the operation is the same but the constant value (key) is different, the cipher is said to be asymmetric.
Such a cipher is too simple an can be easily deciphered, we used it just for explaining the principle. The real asymmetric ciphers make use of more advanced mathematical operations and the keys are based upon large prime numbers. There exists a method how to generate two complementary keys but knowing just one of the keys the other one cannot be calculated. The asymmetric cipher is therefore also called a cipher with a public key. A message is enciphered with a public key that can be made available and it can be deciphered only by a person holding the private key. Thus if I wish to receive enciphered messages form others, it is enough if others can obtain my public key. The private key is just private and no one else must not ever have it under any circumstances.
The message transmission methods suffer from disturbances. We never know whether the received message is complete, whether it was damaged or even intentionally modified by someone. It is not economical to transmise the message by two channels and compare their equality. Instead we take an advantage of a fact that letters are stored in a computer as numbers hence we can calculate a check value that can then be used for verification of message integrity. For the word POT we have P=80, O=79, T=84, so that we can use a simple sum 80+79+84=243. However, such a method gives us no certainty because word TOP will yield the same value. In practice more advanced algorithms are used to ensure that given a value it is impossible to create another meaningful message with the same value. Such a value is called a hash.
By using the method from the previous chapters we can encipher a message and compute its hash. The problem is that an evil person can forge a fake message with properly calculated hash. From the hash verification we cannot find out that the message is forged.
To solve the problem we advance a bit further. We encipher the hash using the private key and add it to the message. A receiver calculates the hash and deciphers the included check value with our public key. If the values equal, the message is authentic. The value calculated by this way is a digital signature. To verify a digital signature knowledge of only a public key is needed.
A central storage of public keys looks promising but as we will show later it does not solve the most important problem. How do we then obtain friend's public key? We simply ask the friend to send it. Now we are sure that no one else can read the message. Moreover we can digitally sign and attach the public key so that the friend can verify the authenticity of the message.
It is pretty simple but it does not work. In the digital world we never communicate directly. It is similar as if we asked someone to obtain friend's public key and give it to us. Such a man in the middle will generate the keys and send one of them saying that this is the friend's public key. Afterwards he asks the friend for the public key. If the message is always delivered the same path, the man in the middle deciphers the message, reads it and enciphers it by friend's real public key. Similarly he can generate fake keys for digital signature so that he could send forged messages. Existence of such a man in the middle cannot be detected.
It would be helpful if we gave the public key personally but this is not possible especially in cases of automatic (machine) communication. A solution is a certificate.
A certificate contains a public key, owner's identification, and time of validity. It can contain other information but it is unimportant for our simplified explanation. What is important is that the certificate is signed by someone and contains the certificate of the signing person. We can thus verify the authenticity of the signature and we know who signed the certificate. Does it solve the problem? No. Such a certificate can be issued by anybody. The certificate must be issued by a certification authority being known that it always verifies the identity of the public key owner.
A single certification authority cannot do the whole job for capacity reasons. A certificate chain exists to solve it. Certification authority CA-0 knows that certification authorities CA-1 and CA-2 conform to the conditions and issues them a certificate granting them the right to issue certificates. Similarly CA-1 issues certificates for certificate authorities CA-a, CA-b, and CA-c. If a friend sends a certificate issued by CA-b and attaches the full certificate chain, we know that the public key in the certificate is authentic.
A certificate is issued in several steps
The answer to the question in the title is NO. A certificate issued by a trusted certification authority merely ensures the authenticity of the public key, nothing less, nothing more. A certificate issued by a trusted certification authority is called a qualified certificate.
The recommended tool for certificates renewal is certbot. The program is written in python. I do have python in my computer but do not use it for my work and do not know it. Unfortunately certbot does not report clearly enough what it does not like therefore I did not manage to make it work.
Quite a lot of alternative tools are offered. I have selected the one with the minimal requirements for other tools, namely ACME.sh written in pure bash. The tool began working at the first attempt without any problem, therefore I have not tried other tools.
Installation of ACME.sh is very easy but its deployment requires a few steps. Apache must be configured in a way allowing smooth collaboration. Automatic certificate renewal must also be properly configured. This topic will be covered in the following text.
When a browser initiates an encrypted connection to a server, it must first obtain its IP address from DNS. It then asks a certificate containing a public key from the server listening on that IP address. Afterwards it can encrypt a request for sending a particular page from a particular server. It sounds pretty simple until we realize that a single IP address can be shared by several servers with different names. The name of the server which we want to communicate with is made available only after the encrypted connection is set but in order to set it the server name must be known in advance so as to send the correct certificate. We thus have a classic hen and egg problem.
There are two possible solutions, both are based upon new extensions of encryption protocols. The first method is Server Name Indication (SNI) which means that the server name is presented during connection establishment. The browser thus receives the right certificate with the public key. The advantage is that each virtual host has its own certificate. The disadvantage is that older browser do not support it. The second method is Subject Alternative Name (SubjectAltName, SAN). In this case the main virtual hosts owns a single certificate which is shared with other virtual hosts with alternative names. It is possible to use an asterisk in order to denote any server in the domain, or a list of names. Even this method need not be supported in older browsers. Moreover, if the list of names is changed, a new certificate must be issued.
Internet Explorer 8 in Windows XP does not support SNI but supports SAN. This is the reason why I used SAN only on the first installation. Later I needed to host two different domains on the same computer sharing the same IP address. SNI was thus used and each of these certificates made used of SAN as well. Internet Explorer 11 in Windows 7 supports this option.
Initial planning is important because a wrong decision will lead to obtaining a certificate with inability of automatic renewal. A wrong beginning will cause you troubles that will have to be solved later. I hope that you learn more from the description of my failures than from a strictly technical manual.
The certificate is issued electronically without a personal contact. The Let's
Encrypt certification authority must therefore use another method for verification of
identity. The certificate is intended for a server therefore its IP address is found in DNS.
The certification authority thus sends a random one-time code to the acme.sh
script and then reads it back taking advantage of information retrieved from DNS. The
certification authority thus knows that the script controls the server which it request
the certificate for.
The script offers a few methods for verification of identity. I have rejected the method based upon DNS. It requires insertion of a TXT record to the primary nameserver. However, my provider supports web interface only, API is not supported. Thus only the following methods remain:
During the first request the script creates its configuration file containing among others an information which method for verification of identity was used. The same method is then used for renewal. A change of the method is possible but requires a bit of effort. It is thus better to think of automatic renewal and its possible difficulties from the very beginning.
One of my servers is not critically important, therefore I decided to shut it temporarily when requesting the certificate. When the certificate expiration was approaching, the script tried to use the same method but it was not possible because my Apache was listening on both ports. Instead of automatic renewal I requested a new certificate manually but this time using the Webroot mode.
I have rejected the Apache mode because I planned to deploy several virtual hosts with a complex configuration which will hardly leave anything unchanged in the original configuration files. I have decided that I can manage installation of a renewed certificate in a better way than the one that can be achieved by a script which knows nothing about my intentions. The following text will therefore address the Webroot method only.
The easiest way is to obtain a certificate when DNS is up and running and all names can be resolved to an IP address but Apache is still in its default configuration. We are then sure that the directory used by ACME.sh for authorization will be accessible. It is important to know that Let's Encrypt does not verify the IP address but all names although they share the same IP address. In the default Apache configuration all requests will be serviced by the same server but it does not matter. ACME.sh requires that all virtual hosts must have a common document root.
Later it will be necessary to ensure that the directory used by ACME.sh for
verification will be accessible from all virtual hosts. The directory is
/.well-known/. If you do not want to have it on a default place, you can
redirect it now by the following directive in the configuration file:
Alias "/.well-known/" "/path/to/.well-known/" |
The /path/to directory must exist and must be writable for the
user under which Apache runs, which is apache in the Redhat based distributions,
www-data in the Debian based distributions. If you use SELinux, you must also set
the correct context. The Apache configuration must allow access by the following
directive:
Require all granted |
After setting the Apache must be restarted. It is then useful to insert any
file to the /.well-lmown/ directory and verify its accessibility. The
directory can then be deleted.
A single directory can be shared by all virtual hosts. It is therefore
possible to reserve one /path/to directory and include the same
Alias directive in all VirtualHost sections.
if you already have your own Apache configuration, start with the redirection given above and verify accessibility from all virtual hosts. If it does not help, read the next chapter and experiment. If you do not ensure accessibility from all virtual hosts, you will not receive a certificate.
If the directory is accessible, we can request the certificate. Let's assume that we require a certificate for the following SAN domains: my-domain.san, www.my-domain.san, preview.my-domain.san, subversion.my-domain.san. We request the certificate as root by:
acme.sh --issue -w $DOCUMENTROOT -d my-domain.san -d www.my-domain.san -d preview.my-domain.san -d subversion.my-domain.san |
$DOCUMENTROOT
is the document root, usually /var/www/html. If you have applied
the redirection given above, the document root is
/path/to.
Verification takes some time. If everything is successful, the directory of
ACME.sh will contain a directory named after the first domain, i.e.
my-domain.san with all necessary files. Their installation will be explained
later.
ACME.sh
will in addition try to register a cron job for certificate renewal.
The command will be written to a crontab belonging to the root. However, the
current distributions do not come with cron but with cronie, usually with
cronie-anacron only. In such a case the crontab command does not exist and
registration fails but we do not mind. If cronie-noanacron is installed (both
packages may be installed together), registration will succeed and we will have to
delete the command by using
crontab -e.
If more domains are hosted, we issue a similar command for each of them. In fact a new domain can be added later by issuing the corresponding command provided the directory structure was well planed in advance. The command can look as:
acme.sh --issue -w $DOCUMENTROOT -d other-domain.san -d www.other-domain.san -d bugzilla.other-domain.san |
In the previous step we generated a private key and obtained a certificate.
The ACME.sh documentation suggests not to use the download directory in the server
configuration but instead use a copy of the files. In order to make things easier we copy
the whole directory. More precisely, we will not copy anything at the moment, instead we
will assume that in the future another process will create the copy and we invent the
location of the files. For instance, we can copy the directory into
/etc/ssl/my-domain.san.
The distributed configuration is a good starting point. As a matter of fact we need just a small change, namely the definition of the key and certificate used. The only thing to be done is to locate and modify three lines:
SSLCertificateFile /etc/ssl/my-domain.san/my-domain.san.cer SSLCertificateKeyFile /etc/ssl/my-domain.san/my-domain.san.key SSLCertificateChainFile /etc/ssl/my-domain.san/fullchain.cer |
We have said that all virtual hosts share a key and a certificate. We would thus have to write the same lines to the configuration of each host which is uncomfortable and, in addition, impractical for the case that in the future we will decide to change the location of the files. Usuall all hosts will have the same basic setup, they will differ in the location of the document root. We thus put the common settings to a special file which will then be loaded by:
Include conf.d/ssl.include |
The whole configuration file of a virtual host may look as:
<VirtualHost *:443>
ServerName preview.my-domain.san
DocumentRoot /var/www/preview

<Directory "/var/www/preview">
  Options Indexes IncludesNOEXEC
  AllowOverride FileInfo
  AuthUserFile /etc/httpd/auth/users
  AuthGroupFile /etc/httpd/auth/groups
  AuthType Basic
  AuthName "A realm for the virtual host"
  Require group allowed-user-group
</Directory>

ErrorLog logs/ssl_preview_error_log
TransferLog logs/ssl_preview_access_log
CustomLog logs/ssl_preview_request_log \
          "%t %h %{SSL_PROTOCOL}x %{SSL_CIPHER}x \"%r\" %b"

Include conf.d/ssl.include
</VirtualHost> |
We usually want to have the same contents on the host with and without www in its name. We achieve it by inserting these lines in the configuration of the main host:
ServerName www.my-domain.san ServerAlias my-domain.san |
So far no problem here. The problem is that all virtual hosts but the main one
should be accessed by the https protocol only. Their configuration will thus contain
redirection. However, doing this we lose accessibility of the /.well-known/
directory. The redirection must thus be implemented ensuring that the above mentioned
directory remains accessible from a common location by the http protocol. Since the
unencrypted virtual hosts contain redirections only, the whole configuration including
global setting resides in a common file vhosts.conf the part of which is shown
below:
# Basic important parameters LimitRequestBody 134217728 SetEnv LC_CTYPE en_US.UTF-8 # Default expiration for all ExpiresActive On ExpiresDefault "access plus 1 hours" # Extended status ExtendedStatus on <Location /server-status> SetHandler server-status Require all granted Allow from localhost </Location> # Virtual hosts over http <VirtualHost *:80> ServerName www.my-domain.san ServerAlias my-domain.san DocumentRoot /var/www/my-domain Include conf.d/mg-redirections.include </VirtualHost> # Forced automatic redirection of all requests to https # Access to /.well-known used by Let's Encrypt <VirtualHost *:80> ServerName preview.my-domain.san DocumentRoot /var/www/html <Directory "/var/www/html"> Options Indexes IncludesNOEXEC AllowOverride FileInfo Require all granted </Directory> RedirectMatch permanent "^(/[^\.].*)" "https://preview.my-domain.san$1" RedirectMatch permanent "^(/?)$" "https://preview.my-domain.san$1" Alias "/.well-known" "/var/www/my-domain/.well-known" </VirtualHost> # Similar lines for other virtual hosts deleted <Directory "/var/www/my-domain/.well-known"> Options -Indexes Require all granted ExpiresDefault "access plus 1 minutes" </Directory> |
For the moment we change the setting in the /.well-known
directory to Options +Indexes, we will need it for debugging.
Certificate renewal will be carried out by the
/etc/cron.daily/certrenew script which is displayed below:
#!/bin/bash

# Parameters, paths, etc.
HOME=/root/.acme.sh
DOMAIN=my-domain.san
ACME=$HOME/acme.sh
ETC=/etc/ssl

# Day of month (zero padded) when the certificate info is displayed
DAY='02'

# Directory autolocation (may need changes)
U=/usr/bin
[ -x $U/echo ] && B=$U || B=/bin

# Web service unit (or init.d script)
SRV=$($B/systemctl list-units --type=service | $U/awk '/^\s*(apache2|httpd)\./ {print $1}')

# Do not touch below this point
C=/var/log/certrenew.log

# Certificate info
function certinfo {
  $U/openssl x509 -in $ETC/$DOMAIN/$DOMAIN.cer -text -noout | $B/egrep '^\s*(Not|Validity|Subject:)' >> $C
}

$B/echo '=============================================================================' >> $C
$B/date >> $C

if [ 0 = $($B/date +%w) ]
then
  $ACME --upgrade 2>&1 >/dev/null || $B/echo "ACME upgrade failed."
fi

if [ "$SRV" = "" ]
then
  $B/echo 'No web service unit found.' >> $C
  exit 2
fi

$B/echo 'Key renewal...' >> $C
$ACME --cron --home $HOME 2>&1 >/dev/null || {
  $B/echo 'Renewal of the certificates failed.' >> $C
  exit 1
}

$U/diff -qr $HOME/$DOMAIN/ $ETC/$DOMAIN/ >/dev/null 2>&1 && {
  $B/echo 'Certificates are OK' >> $C
  [ $($B/date +%d) = "$DAY" ] && {
    certinfo || $B/echo 'Error: cannot examine the certificate.' >>$C
  } || $B/true
} || {
  $B/echo 'Renewing certificates...' >> $C
  $U/rsync -Haq --delete $HOME/$DOMAIN $ETC && {
    certinfo
    $B/echo 'Restarting Apache...' >> $C
    $B/systemctl restart $SRV && $B/echo 'Restarted'>>$C || $B/echo 'Restart failed'>>$C
  } || $B/echo 'Cannot copy certificates to the target directory' >> $C
} |
Only a few lines at the beginning require modification. The script is upgraded
once a week (on Sundays). Afterwards it requests
certificate renewal if needed. If the files in the target directory are old or missing,
the script will install them and restart Apache. The script activity is logged. After
renewal and on the second day of the month (see the DAY variable) basic information on the
certificate is also logged. It is now clear what will be the last step of Apache
configuration. We start the script manually. The certificate is fresh, it will not be
renewed. The target directory does not exist, therefore it will be created and the files
installed there, afterwards Apache will be restarted. Now the https access should
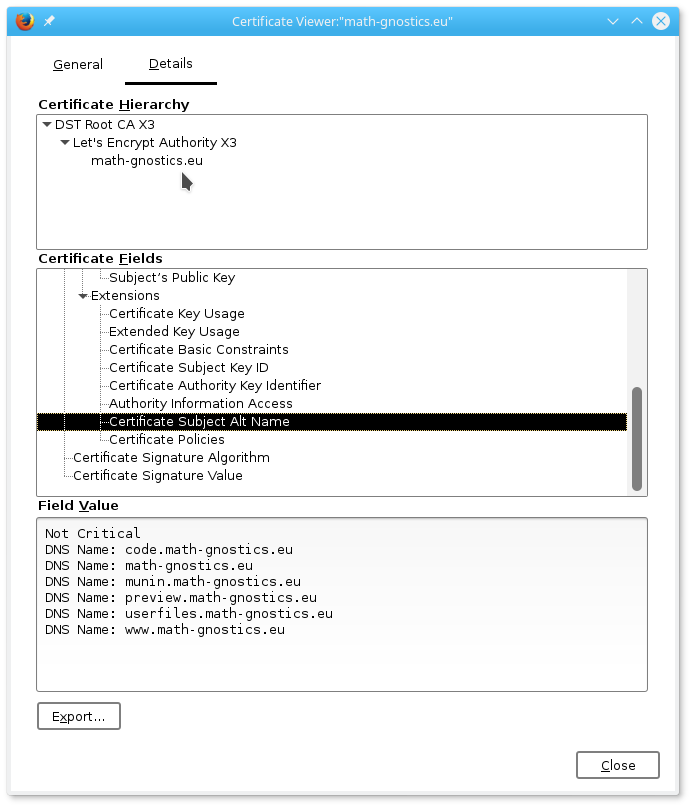
work and the information on the certificate should be similar to that on my server (notice
the value of the Certificate Subject Alt Name field). If anything does not work,
you should always delete the installed files (keep those from ACME.sh), correct the
configuration and always rerun certrenew. This will ensure that the automatic
renewal will not crash.
We do not want to keep the renewal log forever, we therefore create file
/etc/logrotate.d/certrenew:
# Certificate renewal by Lets'Encrypt
/var/log/certrenew.log {
    missingok
    nocompress
    nocreate
    notifempty
    rotate 5
    monthly
    copytruncate
} |
The log is usually rotated after the attempt of renewal, that's why we have
used
DAY='02'.
The following instructions are valid both for SNI certificate and for the case
that the domains have different IP addresses. In addition, each of the certificates may be
of the SAN type. The ACME.sh script automatically checks certificates in all subdirectories
and renews all of them which need to be renewed. The certrenew script is thus
just a little more complex than the one in the previous section:
#!/bin/bash

# Parameters, paths, etc.
HOME=/root/.acme.sh
DOMAIN=LetsEncrypt
CERTS=$HOME/$DOMAIN
ACME=$HOME/acme.sh
ETC=/etc/ssl

# Day of month (zero padded) when the certificate info is displayed
DAY='02'

# Directory autolocation (may need changes)
U=/usr/bin
[ -x $U/echo ] && B=$U || B=/bin

# Web service unit (or init.d script)
SRV=$($B/systemctl list-units --type=service | $U/awk '/^\s*(apache2|httpd)\./ {print $1}')

# Do not touch below this point
C=/var/log/certrenew.log

# Certificate info
function certinfo {
  for dir in $ETC/$DOMAIN/*
  do
    cert=${dir##*/}.cer
    $U/openssl x509 -in $dir/$cert -text -noout | $B/egrep '^\s*(Not|Validity|Subject:)' >> $C
  done
}

$B/echo '=============================================================================' >> $C
$B/date >> $C

if [ 0 = $($B/date +%w) ]
then
  $ACME --upgrade 2>&1 >/dev/null || $B/echo "ACME upgrade failed."
fi

if [ "$SRV" = "" ]
then
  $B/echo 'No web service unit found.' >> $C
  exit 2
fi

$B/echo 'Key renewal...' >> $C
$ACME --cron --home $HOME 2>&1 >/dev/null || {
  $B/echo 'Renewal of the certificates failed.' >> $C
  exit 1
}

$U/diff -qr $CERTS/ $ETC/$DOMAIN/ >/dev/null 2>&1 && {
  $B/echo 'Certificates are OK' >> $C
  [ $($B/date +%d) = "$DAY" ] && {
    certinfo || $B/echo 'Error: cannot examine the certificate.' >>$C
  } || $B/true
} || {
  $B/echo 'Renewing certificates...' >> $C
  $U/rsync -Haq --delete $CERTS $ETC/ && {
    certinfo
    $B/echo 'Restarting Apache...' >> $C
    $B/systemctl restart $SRV && $B/echo 'Restarted'>>$C || $B/echo 'Restart failed'>>$C
  } || $B/echo 'Cannot copy certificates to the target directory' >> $C
} |
Now we are close to the end of the procedure. We have to verify accessibility
of the /.well-known/ directory on all virtual hosts by the http
protocol. If a virtual host must only be accessible by the https protocol, we
include in its configuration the following lines:
Header always set Strict-Transport-Security "max-age=63072000; includeSubdomains" Header always set X-Frame-Options DENY Header always set X-Content-Type-Options nosniff |
Do not use these commands in a configuration of a server that requires also unencrypted connection. However, by using these commands you will attain A+ grade on https://www.ssllabs.com/ssltest/index.html.
Do not forget to restart Apache after each change of the configuration.
No matter how careful we are it may happen that certificate renewal fails for
no apparent reason. The installation directory of ACME.sh contains the
account.conf file where we define the LOG variable and uncomment DEBUG=1.
During the next run we then obtain information that can help in diagnostics.
We have said that knowing just the public key it is impossible to determine the private key. This is not the full truth. Direct calculation is impossible but there is brute force trial and error method. A huge amount of errors is needed hence the task is considerably time consuming. The solution is that the key must expire sufficiently soon. That's why the validity of the certificate from Let's Encrypt is three months only. However, during renewal ACME.sh just creates a new request for existing keys. At least once a year ACME.sh should generate new keys.
The approach chosen by ACME.sh is lightweight with respect to existence of other tools. the method described on this page requires only tools that are available in other operating systems including OS/2 (eComStation). The logrotate program can be replaced by including the year and month in the log file name and old log files can be removed by other mechanism.
Download certrenew.tar.gz (4 KiB)